I started this page up, as I was so tired of trying to post pics in multiple forums and trying to keep up with what I was doing . My current hobby is assembling electronic projects. It's not really electronics as such, as I don't design or develop projects. I search and read other peoples sites and get great ideas and projects to complete.
I learn enough to get by. I am too busy to go back and start all over again with the theory side of things. Maybe through all this I'll start picking things up again.
So you will NOT see or read a great deal of high tech information on here. I will from time to time post links to related information that I have found, or great sites I've come across. I don't want to spend my time repeating other peoples work, especially as they know a heck of a lot more than I ever will.
I will be back from time to time adding bits and pieces....
This is actually a confusing site to use, so start off at the December page and then work through the months in order, as I only get time to do a little work at a time, I will not be pasting huge volumes of work up every week. Also you will note that sometimes photos are larger on some pages, this is due to limitations of the site. If I post big pictures, it limits the amount I can put up. So if I feel a picture may be quite important or contain some detail, I'll publish a large one, but otherwise they will all be small or medium sized ones. If you would like some information regarding the build or something I have done or used in the construction, just leave a message here and I'll try to answer it.
Cheers
Brett.
About a year ago I started thinking about building a set of speakers. I had been thinking about single drivers, but in my research I came across an excellent web page about dual cone drivers.
The site is called http://www.hawthorneaudio.com/ I was won over with their 15" drivers. I purchased a pair and set them up in the box's they came in. They sounded very nice, but were lacking in the bass, compared to my image speakers http://www.imageloudspeakers.com/ .
The Image speakers(416's) were really nice but I had made a cheap pair of speakers using a plan from Fostex, and a pair of drivers from a Sony mini system. They totally blew the mid section of the images away. And were so cheap to construct. This is what got me thinking about putting together a set of speakers using some good drivers.
I took the plunge and went back to Hawthorne and bought a set of Augie's(check them out) which would drive the bass in my new setup. O.k so I had the drivers but was still no closer to getting them up and running as I realised I was going to have to run a separate amps for the Augies, yes you go it, bi-amping. This was all new to me so back to the net I went, and in particular http://www.diyaudio.com/ to have a look around and try and see what my options were. I found the Passlabs section and went to http://www.passdiy.com/ where I found information on Nelson's new baby, the F5.
This would be the first time that I had undertaken a build like this as it meant doing everything from scratch. I had built a couple of chipamps(see diyaudio, chipamp section). But I had never constructed anything like this before and it was class A. Which would mean some serious heat sinking.
So it begins: Construction
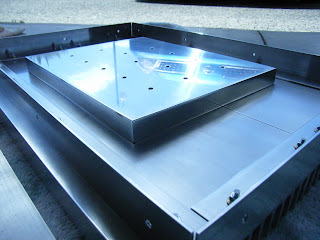
I had bought 2.5 m of heat sink from a aluminium supplier a few years back but it had no rating, so I was going to have to make sure this would do. I purchased another plate of aluminium, which I think was about 16mm x 210 x 340. I started to cut all this up. As the heat sinks were going to be rather large, they would determine the build size of the amp. It turns out that the sides would measure 270mm H x 380mm long. I went and bought I piece of wood that would be used for the front panel. My way of thinking was that if the dam thing was going to be this big I may as well have a really big and chunky front panel to match the sides.

I set the plate out on top of the two strips of H/S marked everything out and drilled the holes.
I will never do this again as it is very time consuming and very difficult to get everything lined up. And without proper tools there is always mistakes.
The brackets were measured and cut and drilled.
Then came the sanding......and sanding.........and more sanding.
This was along job and was not done to look all lovely and shiny. It was done to get good heat transfer from the plates to the H/S.

The next section would involve putting the sides on to the front panel and the top and bottom sections. But I did a quick mock up to check that everything would sort of fit together. And that my idea would actually look O.K.

After completing the H/S I started sanding the front plate. This turned out to measure 270mm H x 430mmW x 60mm D. The one good thing about using this wood as the font panel is that it would be easy to attach the two sides.

Everything seemed to be O.k. Had to check that they all lined up and where square. After speaking with someone at diyaudio, it was suggested that I put a small gap between the H/S and the front plate to reduce the risk of the H.S's heating the varnish up too much and making it flake off. So I placed some washes between the two.

So here are the the two sides attached.

Hey, this is excellent work, keep it going.....................hehe
ReplyDeleteYeah, this is great stuff, your a god dam legend............;)
ReplyDelete